Table of Contents
ToggleWalk into any kitchen showroom and you’ll find them: clean lines, recessed panels, and that crisp white finish that never seems to go out of style. White Shaker cabinets have dominated kitchen renovations for decades, and they’re not slowing down. Whether you’re planning a full remodel or swapping out doors on a budget, understanding what makes these cabinets work, and how to choose, pair, and install them, saves you time, money, and regret. This guide covers the essentials without the fluff.
Key Takeaways
- White Shaker kitchen cabinets feature simple five-piece door construction with recessed panels and clean lines that have remained popular for decades due to their timeless design and versatility.
- These cabinets maintain strong resale value and appeal to home buyers because their neutral aesthetic doesn’t lock you into one design style, allowing countertops and finishes to evolve without full replacement.
- Quality matters more with hardware and construction: invest in soft-close undermount slides (lasting 20+ years versus 3 years for cheap alternatives) and plywood cabinet boxes that resist moisture and hold weight better than particleboard.
- White Shaker cabinets work across farmhouse, transitional, modern, and coastal styles, and can be paired with contrasting colored lowers, open shelving, or two-tone designs for visual interest without abandoning the classic framework.
- Installation success requires level floors and plumb walls verified with a 4-foot level, secure fastening into studs with cabinet screws (not drywall anchors), and working with a helper on upper cabinets to prevent sagging and ensure safety.
- Pair white Shaker cabinets with quality finishes like catalyzed conversion varnish topcoats for resistance to yellowing and moisture, and choose hardware finishes (brushed nickel, matte black, or brass) that complement your overall kitchen aesthetic.
What Are White Shaker Kitchen Cabinets?
Shaker cabinets originated with the Shaker religious community in the 18th century, who valued simplicity and craftsmanship. The design features a five-piece door: a flat center panel surrounded by four rails (vertical and horizontal frame pieces) joined at the corners. There’s no ornate carving, no raised panels, just clean geometry.
White Shaker cabinets apply a white finish (paint, laminate, or thermofoil) to this classic frame-and-panel construction. The recessed center panel creates subtle shadow lines that add depth without visual clutter. Most Shaker doors use a square inside edge, though some manufacturers offer a slight bevel or roundover for a softer look.
You’ll find white Shaker cabinets in face-frame construction (common in North America, where a frame sits flush with the cabinet box) or frameless European-style (full-overlay doors that cover the entire box front). Both work with Shaker doors, but face-frame construction is more traditional.
The term “Shaker” gets loosely applied. If the door has a recessed flat panel and simple frame, it’s Shaker. If it’s got curves, mullions, or heavy trim, it’s not, regardless of what the catalog says.
Why White Shaker Cabinets Remain a Top Choice in 2026
White Shaker cabinets hold their value better than trendy alternatives. They work in rentals, resale properties, and forever homes because they don’t lock you into one aesthetic. Paint colors, countertops, and backsplashes can rotate around them without requiring a full cabinet replacement.
Resale appeal matters. Neutral palettes and familiar styles make homes easier to sell. Buyers can picture their own stuff in a white Shaker kitchen without mental gymnastics. Appraisers and real estate agents consistently note that updated kitchens with classic cabinetry command higher list prices, especially in competitive markets.
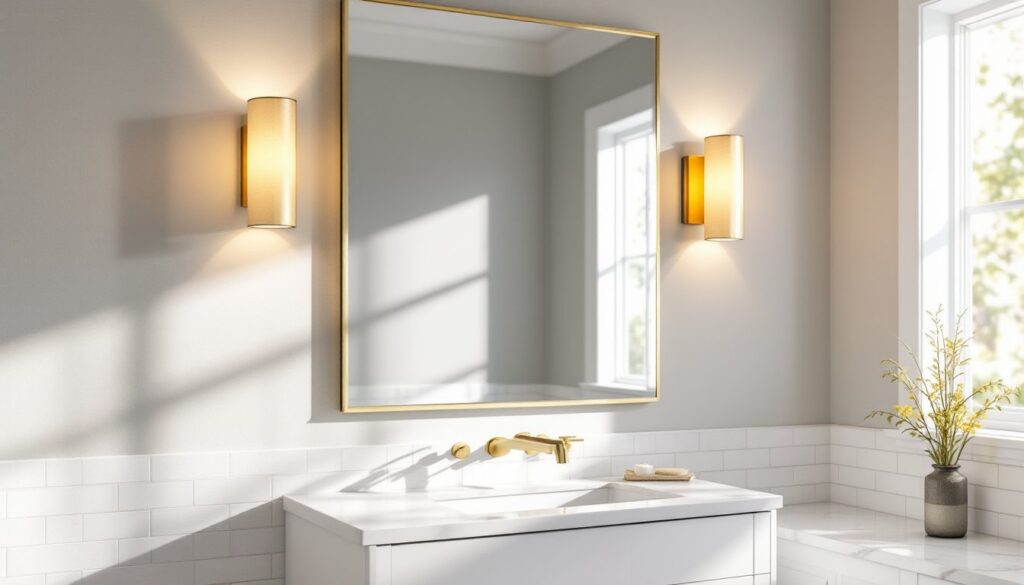
White finishes brighten small or poorly lit kitchens by reflecting ambient and task lighting. If you’re working with a galley layout or north-facing windows, white cabinets make the space feel larger and more open than dark stain or bold color.
Maintenance is straightforward. Modern catalyzed conversion varnish or urethane topcoats resist yellowing, moisture, and kitchen grease better than older lacquers. Scuffs and dings are easier to touch up with white paint than with wood stain, where grain matching becomes an issue.
Design Versatility and Style Options
White Shaker cabinets adapt to farmhouse, transitional, modern, and coastal styles without modification. Pair them with butcher block counters and apron sinks for farmhouse warmth, or combine them with quartz slabs and stainless steel for a contemporary edge. The door style itself stays neutral, your hardware, finishes, and accessories set the tone.
You can mix white Shaker uppers with contrasting lowers (navy, gray, or natural wood) for a two-tone look that’s gained traction since 2023. This approach adds visual interest without abandoning the Shaker framework. Designer portfolios on Remodelista showcase creative pairings that demonstrate how flexible the style can be.
Open shelving, glass-front doors, or floating shelves work alongside white Shaker cabinets without clashing. The simple door profile doesn’t compete with other elements, so you can layer in texture, like woven baskets, ceramic dishware, or potted herbs, without creating visual chaos.
Choosing the Right White Shaker Cabinets for Your Kitchen
Start by measuring your existing layout. Standard base cabinets are 24 inches deep and 34.5 inches tall (36 inches with countertop). Wall cabinets run 12 inches deep, with heights of 30, 36, or 42 inches depending on ceiling clearance. If you’re ordering stock cabinets, they come in 3-inch width increments (12″, 15″, 18″, etc.). Semi-custom and custom lines offer more flexibility but cost more.
Decide between stock, semi-custom, and custom cabinets. Stock cabinets ship fast and cost less ($100–$250 per linear foot installed), but you’re limited to standard sizes and finishes. Semi-custom cabinets ($150–$400 per linear foot) allow modifications like drawer dividers, pull-out shelves, and non-standard heights. Full custom ($500+ per linear foot) means everything is built to your specs, including unusual corner solutions or pantry configurations.
Budget matters, but don’t cheap out on drawer slides and hinges. Undermount soft-close slides (rated for 75–100 lbs) and European-style concealed hinges with soft-close dampers add $20–$40 per cabinet but drastically improve daily function. Cheap side-mount slides wear out in three years: quality undermount slides last 20+.
Material and Construction Quality
Shaker door frames use solid hardwood, typically maple, birch, or poplar, because paint-grade hardwood machines cleanly and holds finish well. The center panel can be solid wood, plywood, or MDF (medium-density fiberboard). MDF panels are stable, don’t expand or contract with humidity, and take paint beautifully. Solid wood panels look authentic but can telegraph grain lines through paint if not prepped correctly.
Cabinet boxes (the structure behind the doors) come in plywood or particleboard. Plywood boxes, especially 3/4-inch multi-ply hardwood plywood, handle weight better, resist moisture, and hold screws securely over decades. Particleboard boxes (often melamine-coated) cost less and work fine in dry climates, but they swell if exposed to leaks.
Check the back panel. Quality cabinets use 1/4-inch or 1/2-inch plywood backs that are dadoed (routed grooves) into the sides for rigidity. Budget cabinets use thin stapled-on panels that flex and shift. If you’re hanging wall cabinets on drywall over studs, a solid back matters, especially for heavy dish loads.
Ask about the finish process. Catalyzed conversion varnish (often called “CV”) is a two-part chemical-cure topcoat used by mid-to-high-end manufacturers. It’s harder, more moisture-resistant, and less prone to yellowing than standard lacquer. Cheaper cabinets use pre-finished thermofoil (vinyl film over MDF), which looks clean initially but can peel at edges near heat sources like dishwashers or ranges.
Hardware and Finish Pairings That Elevate the Look
Cabinet hardware does more heavy lifting than most DIYers expect. Brushed nickel and polished chrome stay neutral and affordable ($2–$8 per pull). Matte black adds contrast and hides fingerprints, it’s been trending since 2021 and shows no signs of fading. Unlacquered brass and oil-rubbed bronze develop patina over time, which works in farmhouse or vintage-inspired kitchens but requires commitment.
Pull sizing follows a loose rule: use 3- to 4-inch bar pulls on drawers and 5- to 6-inch pulls on doors wider than 18 inches. Knobs (1.25″ to 1.5″ diameter) work on narrow doors and some drawers, but pulls offer better ergonomics when your hands are full or wet. Mixing knobs on uppers and pulls on lowers is common, just keep the finish consistent.
Install hardware 2.5 to 3 inches from the bottom corner on upper doors and top corner on lower doors for a classic look. Centered pulls on drawer fronts work best, but if you’re using a horizontal grain or decorative inlay, offset slightly to avoid splitting.
Countertop pairings shape the kitchen’s personality. White quartz (Caesarstone, Silestone, Cambria) offers clean continuity and easy maintenance. Butcher block or reclaimed wood adds warmth and contrasts the white without clashing. Granite in neutral tones (Absolute Black, Kashmir White, or Carrara-look patterns) stays timeless. Avoid busy granite with lots of movement, it competes with the Shaker door lines.
Backsplash choices range from classic 3×6 subway tile (about $5–$15 per square foot installed) to large-format porcelain slabs. White subway tile in a brick or herringbone pattern keeps the focus on cabinetry. If you want personality, try zellige tiles, colored glass mosaics, or even stainless steel sheets. Keep grout lines tight and use unsanded grout for joints under 1/8 inch to avoid scratching glazed tile.
Wall color shifts the mood. Soft grays (Repose Gray, Agreeable Gray) keep things calm. Deep greens or navies (Hale Navy, Hunter Green) add drama without overwhelming. Warm neutrals like greige or cream soften ultra-white cabinets. Test paint samples in your actual kitchen lighting, north-facing rooms skew cool, south-facing rooms warm up fast.
Installation Tips for DIY Enthusiasts
Before you order cabinets, verify your walls are plumb and floors are level. Use a 4-foot or 6-foot level on multiple wall sections. Out-of-plumb walls require shimming during install, and severe floor slopes (more than 1/2 inch over 10 feet) might need leveling compound or adjustable cabinet legs.
Start by installing upper cabinets first, it’s easier to work overhead without base cabinets in the way. Find studs with a stud finder and mark them with painter’s tape. Wall cabinets must fasten into studs with 3-inch cabinet screws (at least two per cabinet into solid framing). Drywall anchors aren’t adequate for a fully loaded cabinet.
Use a temporary ledger board (a straight 1×3 or 1×4 screwed level into the studs at the cabinet bottom height) to support cabinets while you drill and fasten. This frees both hands and prevents sagging. Double-check level across multiple cabinets before final tightening, shimming behind cabinets at high spots corrects minor wall irregularities.
Base cabinets sit on the subfloor or finished floor. If your floor isn’t perfectly level, use plastic shims under the toe kick to bring each cabinet plumb and level front-to-back and side-to-side. Fasten adjacent cabinets together with 1.25-inch cabinet screws through the face frames or cabinet sides before securing to the wall. This creates a unified run that’s easier to align.
Cut holes for plumbing and electrical before setting cabinets if possible. Use a jigsaw for sink base openings and a hole saw for water supply lines. Measure twice, cutting into an installed cabinet is awkward and risks damaging the finish.
Safety gear: Wear safety glasses when drilling overhead or cutting, gloves when handling cabinets (sharp edges and splinters), and a dust mask if cutting MDF or sanding. Keep a cordless drill, 4-foot level, tape measure, shims, clamps, and a stud finder within reach. A helper makes wall cabinet installation infinitely safer, those boxes are heavy and tippy.
If you’re replacing doors on existing boxes (a budget refresh), measure the overlay style first. Full overlay doors cover most of the face frame: partial (or standard) overlay leaves some frame visible. Ordering the wrong overlay means gaps or binding. Many online retailers (like The Kitchn’s recommended suppliers) offer door samples so you can test fit before committing to a full order.
Permits typically aren’t required for cabinet replacement unless you’re moving plumbing, adding electrical circuits, or altering load-bearing walls. Check local building codes if you’re uncertain, an inspector visit is cheaper than a fine or insurance headache down the road.