Table of Contents
ToggleGold wall sconces have a way of transforming a room from ordinary to exceptional, almost like lighting with an exclamation point. Whether you’re renovating a bathroom, adding warmth to a hallway, or layering light in a living room, these fixtures bring both function and polish. Unlike purely decorative elements, sconces do real work: they free up floor and table space, provide task or ambient lighting exactly where you need it, and add vertical interest that pulls the eye upward. And when that finish is gold, whether brushed, polished, antique, or champagne, the effect is timeless without being stuffy. This guide covers everything from picking the right style to wiring them safely on your own.
Key Takeaways
- Gold wall sconces provide both functional task lighting and aesthetic warmth, eliminating shadows and adding vertical interest while working with diverse interior styles from traditional to contemporary.
- Proper placement is critical: mount bathroom sconces at 60-66 inches from the floor flanking mirrors, space hallway fixtures 8-10 feet apart, and position bedroom sconces 18-24 inches from the headboard for optimal functionality.
- Gold finishes in various styles—brushed, polished, antique, and champagne—remain timeless design elements that pair well with mixed metals and materials, making them ideal for modern homes seeking neutral, warm anchors.
- DIY installation of gold wall sconces requires intermediate electrical skills, proper safety equipment, and knowledge of local codes; always confirm power is off, use a voltage tester, and secure fixtures to wall studs or rated toggle bolts.
- Choose between shaded sconces for reduced glare (better for reading and grooming) and open-bulb designs (ideal for vintage Edison-style looks), and consider hardwired versus plug-in options based on permanence and placement needs.
Why Gold Wall Sconces Are a Must-Have for Modern Homes
Gold finishes have staying power. While trends in lighting swing between matte black and brushed nickel every few seasons, gold remains a constant, partly because it works across design eras and partly because it warms up a space instantly. In modern homes with cool-toned grays, whites, and concrete, gold wall sconces introduce warmth without requiring a full palette shift.
From a practical standpoint, sconces solve lighting problems that overhead fixtures can’t. They eliminate shadows on either side of a bathroom mirror, highlight artwork, frame a bed, or guide you down a dim hallway at night. Mounted at 60 to 66 inches from the floor (measured to the center of the fixture), they put light at eye level, ideal for reading, grooming, or simply creating a layered lighting scheme.
Gold also pairs well with a wide range of materials: marble, wood, painted drywall, tile, even wallpaper. It reads as a neutral metal in the same way brass or bronze does, which means it doesn’t demand the rest of your hardware match exactly. That flexibility is why designers featured in publications like Architectural Digest often use mixed metals in the same room, with gold sconces anchoring the look.
Types of Gold Wall Sconces to Suit Every Design Style
Traditional and Vintage Gold Sconces
Traditional sconces lean on ornamentation: scrolled arms, candelabra bulbs, crystal or glass shades, and finishes like antique gold or aged brass. These work best in spaces with crown molding, wainscoting, or other period details. Expect backplates with decorative etchings, curved arms that extend 6 to 10 inches from the wall, and glass shades that diffuse light softly.
Vintage-inspired sconces often mimic mid-century or Art Deco styles, think geometric backplates, globe shades, or cone-shaped reflectors. Polished brass or champagne gold finishes are common. If you’re restoring an older home or want to add character to new construction, vintage sconces with exposed filament bulbs (Edison-style LED bulbs recommended for energy efficiency) deliver that warm, nostalgic glow.
One thing to watch: ornate sconces can be top-heavy. Make sure you’re anchoring into a wall stud or using toggle bolts rated for at least 50 pounds if mounting to drywall alone. The junction box itself should be rated for the fixture’s weight.
Modern and Contemporary Gold Sconces
Modern sconces strip away the excess. Clean lines, minimal hardware, and geometric shapes dominate. You’ll see tube sconces, linear bars, disc-shaped backplates, and articulated arms with exposed bulbs. Finishes range from brushed gold (which hides fingerprints) to high-polish or satin.
Contemporary designs often incorporate mixed materials, gold frames with frosted glass, matte black accents with gold interiors, or gold rods paired with fabric or metal shades. These sconces integrate seamlessly into minimalist, Scandinavian, or industrial interiors. Publications like Design Milk frequently spotlight these streamlined fixtures in modern lofts and new builds.
LED-integrated sconces are increasingly common in this category. They’re slimmer, run cooler, and last longer, often 25,000 to 50,000 hours, but they’re harder to replace if the LED fails. Weigh longevity against replaceability before committing.
How to Choose the Perfect Gold Wall Sconces for Your Space
Start with the room’s purpose. In a bathroom, you need even, shadow-free light for grooming, think sconces flanking a mirror, mounted 36 to 40 inches apart and at about 60 inches from the floor. In a hallway, sconces spaced every 8 to 10 feet provide safe navigation without overlighting. In a bedroom, sconces with swing arms or dimmers let you adjust for reading or ambient mood.
Next, consider scale. A sconce that’s too small disappears: too large, and it overwhelms the wall. A general rule: the fixture’s height should be roughly one-quarter to one-third the height of the wall space between the floor and ceiling or between the floor and a horizontal element like a headboard or mantel. For example, on an 8-foot wall, aim for sconces around 24 to 32 inches tall.
Shade or no shade? Open-bulb sconces (including those with vintage Edison bulbs) give off more glare and work best when light isn’t aimed directly at eye level, think above or beside a vanity. Shaded sconces diffuse light and reduce glare, making them better for reading nooks or bedside use.
Finally, check the wiring. Hardwired sconces require an electrical box in the wall and usually involve cutting drywall, fishing wire, and potentially pulling a permit (depending on local electrical codes following NEC guidelines). Plug-in sconces are easier to install but limit placement to areas near an outlet. Battery-operated or rechargeable LED sconces exist but are best reserved for accent lighting, not primary illumination.
Best Rooms and Placement Ideas for Gold Wall Sconces
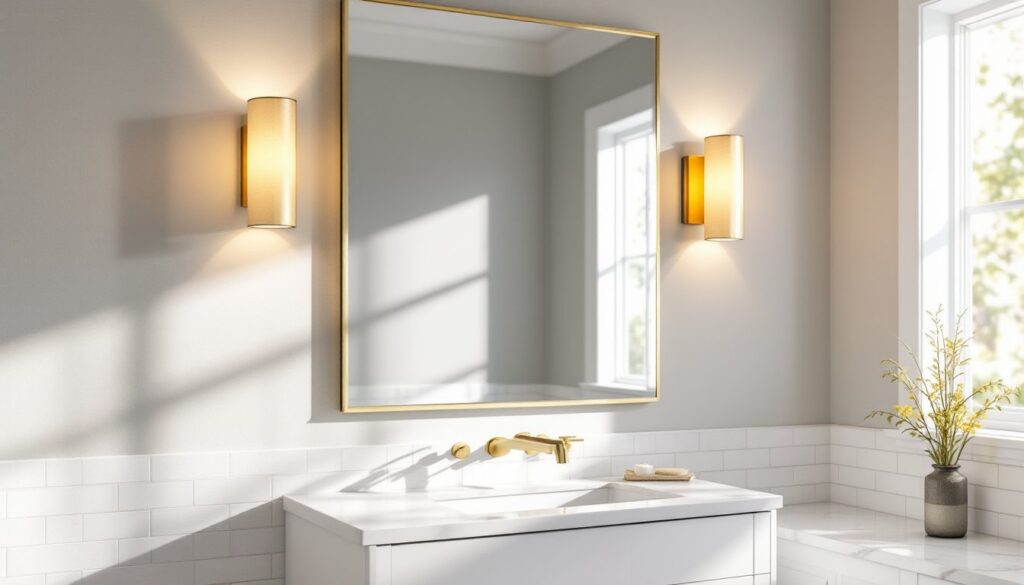
Bathrooms: Flank the mirror with matching sconces for even light. Mount them at eye level (about 60 to 65 inches to the center of the fixture). If space is tight, a single sconce above the mirror works, but side-mounted pairs eliminate shadows better.
Bedrooms: Install sconces on either side of the bed, 18 to 24 inches from the headboard’s outer edge and 30 to 36 inches above the mattress top. Swing-arm or adjustable sconces let each person direct light without disturbing the other. Dimmer switches are almost mandatory here.
Hallways: Space sconces 8 to 10 feet apart and keep them consistent in height, around 66 inches to center. If the hallway has artwork, center sconces above each piece or use picture lights instead.
Living rooms: Use sconces to frame a fireplace, highlight built-ins, or add ambient light in corners where floor lamps feel bulky. In open-concept spaces, sconces help define zones without adding furniture.
Entryways: A pair of sconces flanking a console table or mirror creates a welcoming focal point. Keep the scale proportional to the space, oversized sconces in a narrow foyer feel crowded.
Recent design features, including collections with gold-leaf finished wall sconces, showcase how metallic finishes can anchor high-end interiors while remaining approachable in everyday homes.
Installing Gold Wall Sconces: A DIY Step-by-Step Guide
Difficulty level: Intermediate. You’ll need basic electrical knowledge and comfort working inside walls. If you’re uncomfortable with live wiring or local codes require a licensed electrician for new circuits, hire a pro.
Tools & Materials:
- Voltage tester (non-contact)
- Wire stripper
- Screwdriver set (flathead and Phillips)
- Drill/driver with bits
- Stud finder
- Junction box (old-work box if retrofitting)
- Wire nuts
- 14/2 or 12/2 NM-B cable (depending on circuit amperage)
- Sconces and mounting hardware
- Safety glasses and gloves
Step-by-Step:
-
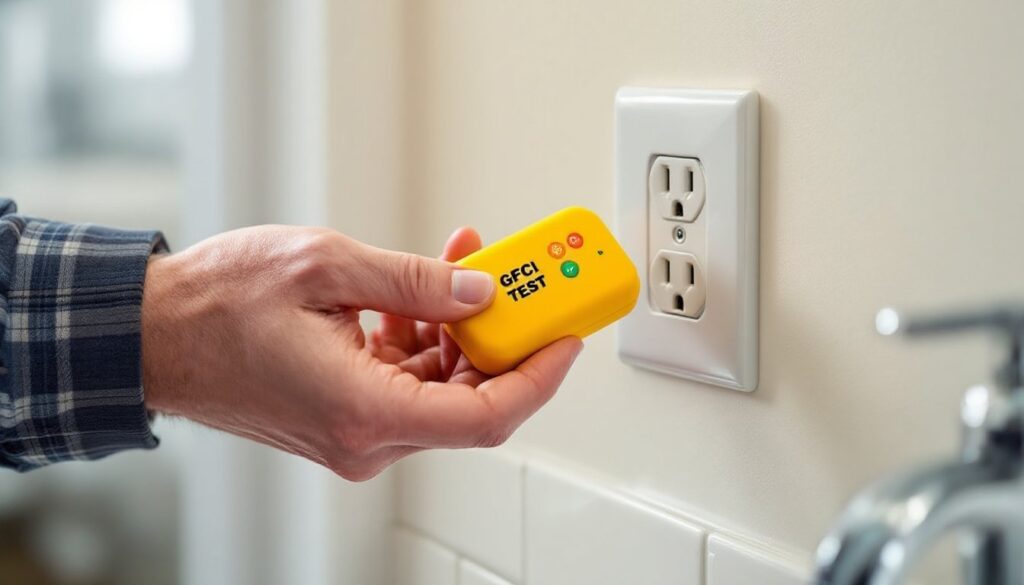
Turn off power at the breaker. Use a voltage tester to confirm no current at the existing switch or proposed sconce location. Don’t skip this, ever.
-
Mark sconce height. Standard is 60 to 66 inches to the fixture’s center. Use a level and pencil to mark the exact spot.
-
Locate studs. If you’re lucky and a stud lines up, great, mount the junction box directly to it. If not, you’ll need an old-work (retrofit) electrical box with adjustable ears that clamp to the drywall. These are rated for fixtures up to 50 pounds typically: check the box labeling.
-
Cut the opening. Trace the junction box outline and cut carefully with a drywall saw or oscillating multi-tool. Go slow, drywall repair is tedious.
-
Run cable. If you’re adding a new sconce location, you’ll need to fish 14/2 or 12/2 NM-B cable from the switch or an existing junction box. This often means drilling through studs (use a right-angle drill if working between floors). Pull enough slack to work comfortably, about 8 inches beyond the box face.
-
Install the junction box. Secure it to the stud with screws or clamp the old-work box ears tight to the drywall.
-
Strip and connect wires. Strip about ½ inch of insulation from each wire. Connect black to black (hot), white to white (neutral), and bare copper to green or bare copper (ground). Twist wires clockwise, then cap with wire nuts. Tug each connection to confirm it’s secure.
-
Attach the mounting bracket (usually a crossbar or strap) to the junction box with screws provided. This is what the sconce mounts to.
-
Mount the sconce. Tuck wires neatly into the box, align the sconce’s backplate with the mounting bracket, and secure with screws. Don’t overtighten, brass and gold finishes can strip or scratch.
-
Install bulbs and test. Use the bulb type and wattage specified by the manufacturer (often 40 to 60 watts for incandescent or equivalent LED). Restore power at the breaker and test the switch.
Permit note: Adding new electrical circuits or extending existing ones often requires a permit and inspection. Check with your local building department before starting. If you’re simply replacing an existing sconce, permits are usually not required, but codes vary by jurisdiction.
Safety reminder: Always wear safety glasses when drilling overhead, and use gloves when handling sharp metal edges or cutting drywall. If you smell burning plastic or see sparks, shut off power immediately and consult a licensed electrician.