Table of Contents
ToggleA double sink bathroom vanity transforms a cramped morning routine into a functional workspace where two people can prep without bumping elbows. Whether it’s a master bath renovation or a new build, the right dual-sink setup balances counter space, storage, and plumbing constraints. This guide covers sizing, style options, key features, and what it takes to install one, so homeowners can decide if this is a DIY weekend or a job for a licensed plumber and carpenter.
Key Takeaways
- A bathroom vanity double sink eliminates morning bottlenecks in shared bathrooms and typically adds 60–70% resale value in homes with three or more bedrooms.
- Standard double sink bathroom vanity widths range from 60 to 84 inches, with 60 inches being the minimum comfortable size to accommodate two sinks and usable counter space.
- Engineered quartz countertops are durable and low-maintenance, while natural granite and marble require annual sealing; choose based on your maintenance tolerance and budget.
- DIY vanity replacement works for like-for-like swaps with matching dimensions, but moving plumbing lines, adding wall-mounted units, or electrical upgrades require hiring licensed professionals.
- Proper sink mounting (undermount, drop-in, or vessel), faucet compatibility, and plumbing alignment must be verified before purchase to avoid costly modifications and installation delays.
- Wall-mounted and floating vanities demand precision stud location and code-compliant anchors, making professional installation essential for safety and durability.
Why Choose a Double Sink Bathroom Vanity?
A dual-sink vanity solves the single biggest complaint in shared bathrooms: bottleneck mornings. Two sinks mean two people brushing teeth, washing faces, or styling hair at the same time without the awkward shuffle.
Beyond convenience, double vanities add resale value. Buyers expect dual sinks in master baths, especially in homes with three or more bedrooms. According to bathroom renovation data, master bath upgrades, including vanity expansions, typically recoup 60–70% of their cost at resale, varying by region and material quality.
They also create visual symmetry. A well-proportioned double vanity anchors the room, frames mirrors, and offers balanced lighting placement. That said, they demand square footage: cramming a double sink into a narrow space sacrifices counter area and creates a cluttered feel. If the bathroom is under 60 inches wide or already packed with a tub and toilet, a single-sink vanity with ample counter space often makes more sense.
Key Dimensions and Space Requirements
Standard double sink vanities range from 60 to 84 inches in width. A 60-inch unit is the minimum to comfortably house two undermount or drop-in sinks with a few inches of counter between them. Anything shorter forces sinks too close, leaving no usable space for toiletries.
The standard vanity height is 32 to 36 inches, though “comfort height” units at 36 inches are increasingly common, matching kitchen counter standards and reducing back strain. Depth typically runs 21 to 22 inches, but wall-mounted or floating vanities may be shallower to preserve floor space in tight layouts.
Each sink needs a minimum 12 inches of clearance from the vanity edge and at least 30 inches of clear floor space in front for building code compliance (check local IRC adoptions). If the bathroom includes a separate shower or tub, factor in door swing clearance and traffic flow. A 72-inch vanity in an 8×10-foot bath works: the same unit in a 5×8 space will dominate the room and crowd the toilet.
Measure rough-in plumbing before buying. Most double vanities require two P-traps and separate drain assemblies. If existing supply lines and drains aren’t spaced to match the new sink positions, budget for plumbing modifications, sometimes involving cutting into drywall and potentially relocating vent stacks.
Popular Double Sink Vanity Styles and Materials
Modern and Contemporary Designs
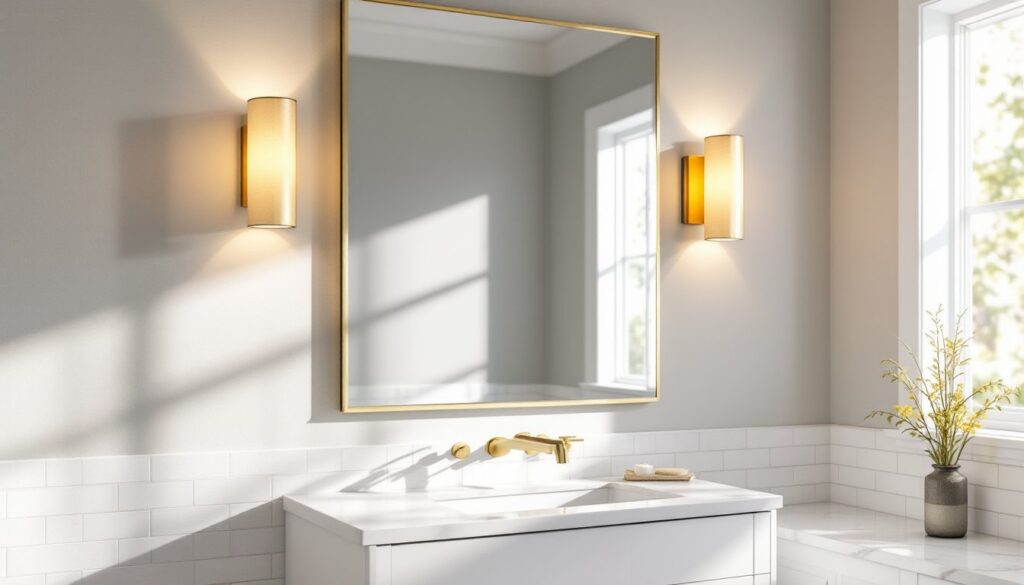
Modern vanities favor clean lines, minimal hardware, and integrated or vessel sinks. Materials lean toward engineered quartz countertops, medium-density fiberboard (MDF) cabinets with high-gloss or matte lacquer finishes, and floating wall-mount frames that expose the floor for a spacious feel.
Vessel sinks, bowl-style basins that sit atop the counter, are popular in contemporary baths but demand extra counter height and careful faucet placement. Wall-mounted faucets keep counters clear but add plumbing complexity and cost. For ideas showcasing modern layouts and material pairings, designer galleries often feature real project photos with contractor details.
Integrated sinks molded directly into quartz or solid-surface countertops eliminate the seam between basin and counter, simplifying cleaning and creating a seamless look. Expect to pay a premium: integrated quartz tops for a 72-inch vanity often run $800–$1,500 depending on color and edge profile.
Traditional and Farmhouse Options
Traditional vanities use framed cabinetry, raised-panel doors, and undermount sinks paired with granite, marble, or cultured marble countertops. Hardware is visible, brushed nickel or oil-rubbed bronze pulls and knobs, and toe kicks are fully enclosed.
Farmhouse styles blend rustic wood tones (reclaimed pine, oak, or distressed finishes) with apron-front or deep rectangular sinks. Open shelving often replaces lower cabinet doors, offering easy access to towels but requiring tidier storage habits. For inspiration and product sourcing, curated design guides highlight farmhouse vanity builds and finish combinations.
Solid wood vanities, maple, oak, or birch, handle moisture better than particleboard but still need proper sealing around sinks and faucet decks. Avoid MDF in high-humidity baths without exhaust fans: water infiltration causes swelling and delamination.
Essential Features to Consider Before Buying
Countertop material affects durability and maintenance. Engineered quartz resists staining and doesn’t require sealing: natural granite and marble need annual sealing and are prone to etching from acidic toiletries. Cultured marble is budget-friendly but scratches more easily than stone or quartz.
Sink mounting style matters for cleaning and counter space. Undermount sinks attach beneath the countertop, leaving a clean surface and simplifying counter wipe-down. Drop-in (self-rimming) sinks sit atop a cutout with a visible lip, easier to install but the rim collects grime. Vessel sinks add height and visual interest but reduce usable counter depth.
Storage layout should match usage. Drawers beat doors for organizing small items, makeup, razors, hair tools, and soft-close hardware prevents slams. If plumbing eats into cabinet space, look for vanities with offset drains or drawer notches that work around P-traps. Shelves behind doors suit bulk storage (toilet paper, towels), but deep cabinets become black holes without pullout organizers.
Faucet compatibility is non-negotiable. Most vanity tops come pre-drilled for widespread (8-inch spread) or single-hole faucets. Vessel sinks often require tall spouts or wall-mounted faucets to clear the basin rim. Confirm hole configuration before buying the top or order undrilled and have holes cut to match your chosen faucets, but drilling natural stone or quartz is tricky and best left to fabricators.
Water supply and drain placement must align with existing plumbing or include a plan (and budget) to relocate them. Standard supply risers are 20–22 inches above the floor: drains typically exit 16–20 inches up. If the new vanity’s sinks don’t align, extension kits or flexible connectors may bridge the gap, but code may require hard plumbing, especially if walls are open.
Installation Overview: DIY vs. Professional Help
Installing a double sink vanity is a multi-trade job: carpentry, plumbing, and sometimes electrical if new lighting or outlets are involved. A handy DIYer with plumbing experience can handle a like-for-like swap (same width, same sink positions) in a weekend. Moving plumbing lines, expanding the vanity footprint, or installing wall-mount units usually justifies hiring a licensed plumber and carpenter.
DIY-friendly scenarios include replacing an existing 60-inch double vanity with a new 60-inch unit where drain and supply locations match. Basic steps:
- Shut off water at the shutoff valves or main if no local valves exist.
- Disconnect supply lines and P-traps. Have a bucket ready, residual water will spill.
- Remove the old vanity. Cut caulk along the wall and countertop with a utility knife, then unscrew or pry the cabinet from wall studs.
- Check the wall for damage, patch as needed, and confirm the floor is level. Shim the new vanity if necessary.
- Position and secure the cabinet to wall studs using 3-inch wood screws through the back rail.
- Install the countertop and sinks, following manufacturer instructions. Undermount sinks may need clips or epoxy: drop-in sinks rest on a bead of silicone.
- Connect faucets, supply lines, and drains. Use Teflon tape on threaded fittings and tighten P-traps hand-tight plus a quarter turn with pliers.
- Turn water on slowly, checking for leaks at connections. Run both sinks for a few minutes and inspect drains.
- Caulk the backsplash and sides with silicone to seal against moisture.
Call a pro if:
- Plumbing rough-in doesn’t match the new sink layout (requires cutting drywall, moving drains, or re-routing vent pipes).
- The vanity is wall-mounted or floating, demanding precise stud location and heavy-duty anchors rated for the combined weight of cabinet, top, sinks, and water.
- Electrical work is needed to add outlets, move lighting, or meet current NEC code (GFCI protection is required within 6 feet of water sources).
- The project involves structural changes, removing a wall, relocating a toilet, or adding a window, that may require permits and inspections.
Permit requirements vary by jurisdiction. Cosmetic vanity replacement typically doesn’t need a permit, but moving plumbing or electrical often does. Check with the local building department before starting.
Safety notes: Wear safety goggles when cutting or drilling. Use a dust mask if sanding or working with drywall compound. Turn off power at the breaker if working near outlets or light fixtures. If the existing vanity shows mold or water damage, address the source (leaky pipes, poor ventilation) before installing the new unit, otherwise the problem recurs.